Custom Images User Guide
What is a custom image?
Often the Desktop instances in your Rooms will need to be configured with applications and resources in order to provide your users with the tools they need to do their tasks.
Doing such customization on each and every Desktop instance is tedious and time-consuming.
A custom image is an image of a Desktop instance that can be used to create new Desktop templates that have the same configuration, (installed applications etc.), as that initial Desktop instance.
Tehama's custom image functionality allows you to
- install/configure applications in a single base Desktop instance, of a given Desktop type, to suit your users needs,
- initiate the creation of an image that becomes your custom image, from that base Desktop instance, and
- create many other Desktop templates, of that same Desktop type, using that custom image. They will all have the same configuration as the base Desktop instance.
Once created, a custom image belongs to your organization. A custom image created from a Desktop of type 'Tehama Windows' or of type 'Tehama Linux' (both of which are 'Tehama Desktops') is available from the Room in which it was created.
Note: Tehama no longer supports the creation of custom images from Desktops of type 'Workspaces'. If your organization has existing custom images created from Desktops of type 'Workspaces', be aware that they are available from every Room in your organization.
Desktops of type 'Workspaces' are approaching end-of-life, and you should consider replacing them with 'Windows Desktops'. See Workspace Desktops (Legacy) for more details.
View Custom Image Table (of type Tehama Desktop only)
Only the Org Admin user, an Org Manager or a Room Manager of an organization can view the table of custom images that have been created in the organization. Room Managers will only see custom images from Rooms of which they are members. Check the description of your custom role, to see if you can view custom images.
You can view a table of the custom images in your organization that have been created from a Desktop of type 'Tehama Desktop' ('Tehama Windows' or of type 'Tehama Linux'). This table is available from the IMAGES option on the DESKTOPS tab. From there, you can select an entry in the table and view its profile details.
Custom images created from Desktops of type 'Workspaces' do not appear in this table.
- Log in to the Tehama Web UI.
- Click on the DESKTOPS tab in the navigation bar.
- Click on the IMAGES option at the top of the page. You will see a table of all the custom images for your organization, except those created from Desktops of type 'Workspaces'. (NOTE: If you are a Staff member in the organization, you will not see options at the top of the DESKTOPS page; the page you see is the equivalent of the DESKTOPS option; you do not have permission to see the table of custom images. Otherwise, your options are DESKTOPS and IMAGES. DESKTOPS is the default option.)
Click on the name (under the Images column) of a custom image entry to make its profile page will appear. On this page you will see the name and description of the custom image, along with its base Desktop instance and the date of its creation, the name of its creator, and a table showing the Desktop templates that use this custom image and the number of instances there are of each.
View Custom Image associated with a Desktop Template (of type Tehama Desktop only)
The Org Admin user, an Org Manager or a Room Manager of an organization can view a list of all the Desktop templates in their organization in the DESKTOPS tab, along with the "Image" data for the template. Room Managers will only see Desktop templates from Rooms of which they are members. Check the description of your custom role, to see if you can see "Image" information in the DESKTOPS tab.
You can view which custom image (if any) a particular Desktop template is associated with from the DESKTOPS tab. The DESKTOPS option on the DESKTOPS tab displays a table of Desktop instances. Each entry in the table displays both the name of the template for the Desktop, in the table's "Desktop template" column, and the name of the 'image' used by the template, either a base image or a custom image, in the table's "Images" column.
Entries in this table with Desktop templates that are associated with custom images created from Desktops of type 'Workspaces' do not display the name of their respective custom images. The "Images" column field for these entries will be blank.
- Log in to the Tehama Web UI.
- Click on the DESKTOPS tab in the navigation bar.
- Verify that the DESKTOPS option at the top of the page is selected. You will see a table of Desktop instances. (NOTE: If you are a Staff member in the organization, you will not see options at the top of the DESKTOPS page; the page you see is the equivalent of the DESKTOPS option except you do not have permission to see custom image data. Otherwise, your options are DESKTOPS and IMAGES. DESKTOPS is the default option.)
- Either:
- List your assigned Desktops: Click the My Desktops radio button at the top of the page. (NOTE: If you are a Staff member in the organization, you will not see this radio button. The list will be restricted to only your assigned Desktops by default.) Your Desktop instances will be uniquely identified by the template name and the Room name.
- List all Desktop instances in the organization: Click the All Desktops radio button at the top of the page. (NOTE: If you are a Staff member in the organization, you will not see this radio button. You are unable to see Desktops that are not your own.) The Desktop instances will be uniquely identified by the template name, the Room name, and the name of the assigned user.
- Find an entry in the table for the Desktop template that you are interested in. (You may see multiple entries for a template, if you opted to list all Desktop instances, and it is assigned to multiple users.)
- Observe the "Images" column value for the entry. If the Desktop template uses a custom image, the custom image's name will be displayed in this column. (NOTE: If you are a Staff member in the organization, you will not see this column; you do not have permission to see custom image data.)
Click on the name of the custom image for your Desktop template to make its profile page appear. On this page you will see the name and description of the custom image, along with its base Desktop instance and the date of its creation, the name of its creator, and a table showing the Desktop templates that use this custom image and the number of instances there are of each.
View Custom Image Profile (of type Tehama Desktop only)
Custom images list: Only the Org Admin user, an Org Manager or a Room Manager of an organization can view the table of custom images that have been created in the organization. Room Managers will only see custom images from Rooms of which they are members.
Check the description of your custom role, to see if you can view custom images.
Image profile pages are available for custom images created from Desktops of type 'Tehama Windows' or 'Tehama Linux'. A profile page contains the name and description of the custom image, along with its base Desktop instance and the date of its creation, the name of its creator, and a table showing the Desktop templates that use this custom image and the number of instances there are of each.
Note: Image profiles are not available for custom images created from Desktops of type 'Workspaces'.
You can view a profile of a custom image (one that has been created from a Desktop of type 'Tehama Windows' or 'Tehama Linux') in several ways.
- From the Images table, available from the IMAGES option on the DESKTOPS tab. From there, you can select an entry in the table and view its profile details.
- Log in to the Tehama Web UI.
- Click on the DESKTOPS tab in the navigation bar.
- Click on the IMAGES option at the top of the page. You will see a table of all the custom images for your organization, except those created from Desktops of type 'Workspaces'. (NOTE: If you are a Staff member in the organization, you will not see options at the top of the DESKTOPS page; the page you see is the equivalent of the DESKTOPS option; you do not have permission to see the table of custom images. Otherwise, your options are DESKTOPS and IMAGES. DESKTOPS is the default option.)
- Either:
- Click on the name (under the Images column) of a custom image entry.
- Click on the actions menu (three vertical dots) of a custom image entry, to open the menu, and select the "View" menu option.
- From the Desktop templates table, available from the DESKTOPS option on the DESKTOPS tab. From there, you can select the custom image associated with a Desktop template and view its profile details.
- Log in to the Tehama Web UI.
- Click on the DESKTOPS tab in the navigation bar.
- Verify that the DESKTOPS option at the top of the page is selected. You will see a table of Desktop instances. (NOTE: If you are a Staff member in the organization, you will not see options at the top of the DESKTOPS page; the page you see is the equivalent of the DESKTOPS option except you do not have permission to see custom image data. Otherwise, your options are DESKTOPS and IMAGES. DESKTOPS is the default option.)
- Either:
- List your assigned Desktops: Click the My Desktops radio button at the top of the page. (NOTE: If you are a Staff member in the organization, you will not see this radio button. The list will be restricted to only your assigned Desktops by default.) Your Desktop instances will be uniquely identified by the template name and the Room name.
- List all Desktop instances in the organization: Click the All Desktops radio button at the top of the page. (NOTE: If you are a Staff member in the organization, you will not see this radio button. You are unable to see Desktops that are not your own.) The Desktop instances will be uniquely identified by the template name, the Room name, and the name of the assigned user.
- Observe the "Images" column value for the entries in the table. If the Desktop template for an entry uses a custom image, the custom image's name will be displayed in this column. (NOTE: If you are a Staff member in the organization, you will not see this column; you do not have permission to see custom image data.)
- Click on the name of a custom image (from any of the entries associated with that image in the table). Its profile page will appear.
Create a base Desktop instance
Configuration of the base Desktop instance (the Desktop used as a base for the custom image) can be done by any user assigned to the Desktop.
Note: Tehama no longer supports the creation of a custom image from Desktops of the type 'Workspaces'.
(a) Create a Desktop to use as your base Desktop instance
- Create a base Desktop instance by adding a Desktop template, with the base image of your choice, to your Room and assigning yourself to it. A Desktop instance from that template will be created for you.
You will use this Desktop as the base for the custom image. Before requesting the custom image, configure this Desktop with desired applications and resources.
Desktop admin rights:
Your organization, for security, may prefer to construct Desktop templates for your users that do not have desktop admin rights enabled. However that may be, be sure to create your 'Tehama Linux' or 'Tehama Windows' base Desktop instance with admin rights enabled. The admin access will be required to install/configure applications in the Desktop. Desktop templates created from the custom image, can be created with or without desktop admin rights.
(b) Configure your base Desktop instance
- Connect to your base Desktop instance.
- Configure it as desired for your users. Install applications, add resources, etc.
Now your base Desktop instance has the custom configuration that you want all Desktops created from your custom image to have.
Create a custom image (Tehama Windows/Linux only)
Only the Org Admin user, an Org Manager or a Room Manager of a Room's owner organization (owner+connected or user+owner) can trigger the creation of a custom image of a Tehama Windows or Tehama Linux desktop, and they must be a member of the Room. Check the description of your custom role, to see if you can perform this action.
These instructions are for Desktops of the type Tehama Windows and Tehama Linux only.
Note: Tehama no longer supports the creation of a custom image from Desktops of the type 'Workspaces'.
Trigger the creation of a custom image
The user who triggers the creation of the custom image does not need to be the same user who configured the base Desktop instance. Note that if the user who performs this step is not assigned to the base Desktop instance, they must follow Option B in step 1. below.
- Locate your base Desktop instance in the Tehama Web UI:
Option A: this option restricts you to Desktops that you are assigned to- Log in to the Tehama Web UI.
- Click on the ROOMS tab.
- Click on the name of the Room that has your base Desktop instance. You will see the user interface for the Room.
- Click on the Room's WORK tab.
- Click on the MY DESKTOPS sidebar item.
- Locate the entry for your base Desktop instance.
- Log in to the Tehama Web UI.
- Click on the DESKTOPS tab.
- Verify that the DESKTOPS option at the top of the page is selected. You will see a table of Desktop instances. (NOTE: If you are a Staff member in the organization, you will not see options at the top of the DESKTOPS page; the page you see is the equivalent of the DESKTOPS option except you do not have permission to create a custom image. Otherwise, your options are DESKTOPS and IMAGES. DESKTOPS is the default option.)
- Either:
- List your assigned Desktops: Click the My Desktops radio button at the top of the page. Your Desktop instances will be uniquely identified by the template name and the Room name.
- List all Desktop instances in the organization: Click the All Desktops radio button at the top of the page. The Desktop instances will be uniquely identified by the template name, the Room name, and the name of the assigned user.
- Locate the entry for your base Desktop instance.
- Click on the three vertical dots under the Actions column for the entry. The actions' menu will open.
- Select the "Create image" menu item. The CREATE IMAGE dialog will appear.
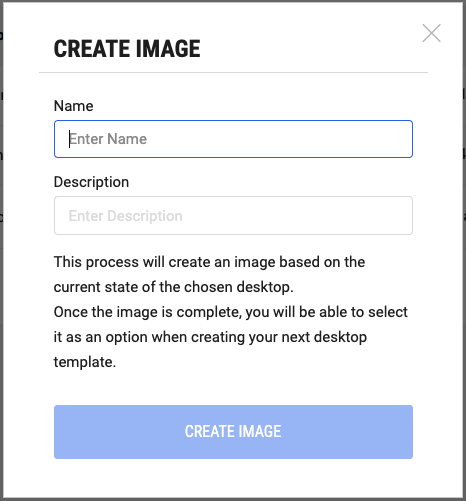
- Enter a name, for example "Project ACME Custom Spec 1", in the Name field.
- Enter a description for your custom image in the Description field.
- Click CREATE IMAGE. A popup will appear that lets you know your request is in progress.
Behind the scenes, the automated process to create your custom image will begin.
The requester will receive an email notification when the custom image becomes available for use.
Once created, the custom image belongs to the Room's owner organization.
Use a custom image
A custom image is available to anyone who can add a Desktop template in a Room that belongs to the organization that owns the custom image. (For a custom image made from a Desktop of type 'Tehama Windows' or of type 'Tehama Linux', this is restricted to the Room in which it was created.)
The Org Admin user and Org Managers and Room Managers (who are members of the Room) of a Room's owner organization (owner+connected or user+owner) can add a new Desktop template, using a custom image, to the Room directly. (See Add a Desktop Template in the Desktops User Guide.) Check the description of your custom role, to see if you can perform this action.
Use your custom image to create Desktop templates, of that same Desktop type. They will all have the same configuration as the base Desktop instance from which you created you custom image.
Choose a Room to create your Desktop templates in:
Your custom image belongs to your organization. A custom image created from a Desktop of type 'Tehama Windows' or of type 'Tehama Linux' is available from the Room in which it was created. An existing custom image created from a Desktop of type 'Workspaces' is available from every Room in your organization.
For custom images of Desktops of type 'Workspaces':
If your goal in creating a custom image was to eliminate, for security, the need for your Desktop templates to have desktop admin rights (so the Desktop users could install/configure applications), select a Room that has not enabled Workspace desktop admin rights. Unlike admin rights for Tehama Windows and Tehama Linux Desktop templates, which are determined when the templates are created, admin rights for Workspace Desktops are inherited from the Room setting. Note: Tehama no longer supports the creation of custom images from Desktops of type 'Workspaces'.
Create a Desktop template with your custom image
- Follow the steps to Add a Desktop Template in the Desktops User Guide), up until you see one of:
- ADD WINDOWS DESKTOP TEMPLATE dialog, for Windows-based Desktop templates (Tehama Windows or Workspace)
- ADD LINUX DESKTOP TEMPLATE dialog, for Linux-based Desktop templates (Tehama Linux)
- Look for the Image field in the dialog.
- Open the Image dropdown.
- Look for the name of your custom image in the dropdown list, for example "Project ACME Custom Spec 1", under the heading "Custom".

- Select your custom image.
- Fill out the rest of the fields on the dialog and continue the creation of your Desktop template as usual.
The resulting new Desktop template will use the custom image to construct desktops.
Edit a custom image (Name and description - of type Tehama Desktop only)
Only the Org Admin user, an Org Manager or a Room Manager of an organization can edit the name and description of a custom image that has been created in the organization. Room Managers will only be able to edit the custom images from Rooms of which they are members. Check the description of your custom role, to see if you can perform this action.
Note: Custom images created from Desktops of type 'Workspaces' cannot be edited.
You can edit the name and description of a custom image in your organization that has been created from a Desktop of type 'Tehama Desktop' ('Tehama Windows' or of type 'Tehama Linux'), in several ways.
- From the Images table, available from the IMAGES option on the DESKTOPS tab. From there, you can select an entry in the table and view its profile details. From the profile page, you can click on the pen icon to bring up the edit page.
- Log in to the Tehama Web UI.
- Click on the DESKTOPS tab in the navigation bar.
- Click on the IMAGES option at the top of the page. You will see a table of all the custom images for your organization, except those created from Desktops of type 'Workspaces'. (NOTE: If you are a Staff member in the organization, you will not see options at the top of the DESKTOPS page; the page you see is the equivalent of the DESKTOPS option; you do not have permission to see the table of custom images. Otherwise, your options are DESKTOPS and IMAGES. DESKTOPS is the default option.)
- Either:
- Click on the name (under the Images column) of the entry for the custom image you wish to edit.
- Click on the actions menu (three vertical dots) of the entry for the custom image you wish to edit, to open the menu, and select the "View" menu option.
- Click on the pen icon to the right of the name in the profile page. The edit page will appear.
- Make changes to the name and description fields.
- Click SAVE.
- From the Images table, available from the IMAGES option on the DESKTOPS tab. From there, you can select an entry's edit action and bring up the edit page.
- Log in to the Tehama Web UI.
- Click on the DESKTOPS tab in the navigation bar.
- Click on the IMAGES option at the top of the page. You will see a table of all the custom images for your organization, except those created from Desktops of type 'Workspaces'. (NOTE: If you are a Staff member in the organization, you will not see options at the top of the DESKTOPS page; the page you see is the equivalent of the DESKTOPS option; you do not have permission to see the table of custom images. Otherwise, your options are DESKTOPS and IMAGES. DESKTOPS is the default option.)
- Click on the actions menu (three vertical dots) of the entry for the custom image you wish to edit, to open the menu, and select the "Edit" menu option. The edit page will appear.
- Make changes to the name and description fields.
- Click SAVE.
- From the Desktop templates table, available from the DESKTOPS option on the DESKTOPS tab. From there, you can select the custom image associated with a Desktop template and view its profile details. From the profile page, you can click on the pen icon to bring up the edit page.
- Log in to the Tehama Web UI.
- Click on the DESKTOPS tab in the navigation bar.
- Verify that the DESKTOPS option at the top of the page is selected. You will see a table of Desktop instances. (NOTE: If you are a Staff member in the organization, you will not see options at the top of the DESKTOPS page; the page you see is the equivalent of the DESKTOPS option except you do not have permission to see or edit custom image data. Otherwise, your options are DESKTOPS and IMAGES. DESKTOPS is the default option.)
- Either:
- List your assigned Desktops: Click the My Desktops radio button at the top of the page. (NOTE: If you are a Staff member in the organization, you will not see this radio button. The list will be restricted to only your assigned Desktops by default.) Your Desktop instances will be uniquely identified by the template name and the Room name.
- List all Desktop instances in the organization: Click the All Desktops radio button at the top of the page. (NOTE: If you are a Staff member in the organization, you will not see this radio button. You are unable to see Desktops that are not your own.) The Desktop instances will be uniquely identified by the template name, the Room name, and the name of the assigned user.
- Observe the "Images" column value for the entries in the table. If a Desktop template uses a custom image, the custom image's name will be displayed in this column. (NOTE: If you are a Staff member in the organization, you will not see this column; you do not have permission to see or edit custom image data.)
- Click on the name of the custom image you wish to edit (from any of the entries associated with that image in the table). Its profile page will appear.
- Click on the pen icon to the right of the name in the profile page. The edit page will appear.
- Make changes to the name and description fields.
- Click SAVE.
Edit a custom image (Desktop configuration)
Currently, it is not possible to edit an existing custom image's desktop configuration (the applications installed on it, etc.).
But it is possible to create a new custom image from an existing one.
Note: Tehama no longer supports the creation of custom images from Desktops of type 'Workspaces'.
To do so:
- Create a new base desktop instance, using your existing custom image as the image for the Desktop template for the instance. Then configure it as required.
- Create a new custom image from this base desktop instance. See 'Create a custom image (Tehama Windows/Linux only)'.
Delete a custom image
Only the Org Admin user, an Org Manager or a Room Manager of an organization can delete a custom image that has been created in the organization. Room Managers will only be able to delete the custom images from Rooms of which they are members. Check the description of your custom role, to see if you can perform this action.
Note: Custom images created from Desktops of type 'Workspaces' cannot be deleted through the Tehama Web UI. Contact Tehama Support if you want to remove a 'Workspace'-based custom image.
You can delete the name and description of a custom image in your organization that has been created from a Desktop of type 'Tehama Desktop' ('Tehama Windows' or of type 'Tehama Linux'), in several ways.
- From the Images table, available from the IMAGES option on the DESKTOPS tab. From there, you can select an entry in the table and view its profile details. From the profile page, you can click on the DELETE button to delete the image.
- Log in to the Tehama Web UI.
- Click on the DESKTOPS tab in the navigation bar.
- Click on the IMAGES option at the top of the page. You will see a table of all the custom images for your organization, except those created from Desktops of type 'Workspaces'. (NOTE: If you are a Staff member in the organization, you will not see options at the top of the DESKTOPS page; the page you see is the equivalent of the DESKTOPS option; you do not have permission to see the table of custom images. Otherwise, your options are DESKTOPS and IMAGES. DESKTOPS is the default option.)
- Either:
- Click on the name (under the Images column) of the entry for the custom image you wish to delete.
- Click on the actions menu (three vertical dots) of the entry for the custom image you wish to delete, to open the menu, and select the "View" menu option.
- Click on the DELETE button to the right of the name in the profile page. The DELETE IMAGE confirmation modal will appear.
- Click DELETE in the modal to delete the image.
- From the Images table, available from the IMAGES option on the DESKTOPS tab. From there, you can select an entry's delete action to delete the image.
- Log in to the Tehama Web UI.
- Click on the DESKTOPS tab in the navigation bar.
- Click on the IMAGES option at the top of the page. You will see a table of all the custom images for your organization, except those created from Desktops of type 'Workspaces'. (NOTE: If you are a Staff member in the organization, you will not see options at the top of the DESKTOPS page; the page you see is the equivalent of the DESKTOPS option; you do not have permission to see the table of custom images. Otherwise, your options are DESKTOPS and IMAGES. DESKTOPS is the default option.)
- Click on the actions menu (three vertical dots) of the entry for the custom image you wish to delete, to open the menu, and select the "Delete" menu option. The DELETE IMAGE confirmation modal will appear.
- Click DELETE in the modal to delete the image.
- From the Desktop templates table, available from the DESKTOPS option on the DESKTOPS tab. From there, you can select the custom image associated with a Desktop template and view its profile details. From the profile page, you can click on the DELETE button to delete the image.
- Log in to the Tehama Web UI.
- Click on the DESKTOPS tab in the navigation bar.
- Verify that the DESKTOPS option at the top of the page is selected. You will see a table of Desktop instances. (NOTE: If you are a Staff member in the organization, you will not see options at the top of the DESKTOPS page; the page you see is the equivalent of the DESKTOPS option except you do not have permission to see or delete custom image data. Otherwise, your options are DESKTOPS and IMAGES. DESKTOPS is the default option.)
- Either:
- List your assigned Desktops: Click the My Desktops radio button at the top of the page. (NOTE: If you are a Staff member in the organization, you will not see this radio button. The list will be restricted to only your assigned Desktops by default.) Your Desktop instances will be uniquely identified by the template name and the Room name.
- List all Desktop instances in the organization: Click the All Desktops radio button at the top of the page. (NOTE: If you are a Staff member in the organization, you will not see this radio button. You are unable to see Desktops that are not your own.) The Desktop instances will be uniquely identified by the template name, the Room name, and the name of the assigned user.
- Observe the "Images" column value for the entries in the table. If a Desktop template uses a custom image, the custom image's name will be displayed in this column. (NOTE: If you are a Staff member in the organization, you will not see this column; you do not have permission to see or delete custom image data.)
- Click on the name of the custom image you wish to delete (from any of the entries associated with that image in the table). Its profile page will appear.
- Click on the DELETE button to the right of the name in the profile page. The DELETE IMAGE confirmation modal will appear.
- Click DELETE in the modal to delete the image.