Getting started with Tehama Administration
Have you completed the Getting Started with Tehama Enclave Creation Guide? If not, please go back and do so before proceeding.
Tehama provides you, through the Tehama Web UI, with an intuitive user interface for Organization/Enclave/Desktop administration tasks. Use this interface now to perform the tasks that are necessary for getting started with Tehama.
Purpose
So far you have joined Tehama, creating your own Tehama organization, and created and/or connected to or joined an Enclave.
Now this guide shows you the steps to carry out the following basic and necessary organization and Enclave set up.
There are different tasks to perform, depending on whether your organization owns or connects the Enclave. In Enclave of, type Standard Enclave and Domain Join Enclave, one organization both owns and connects the Enclave.
-
Step 1: Organization Membership Administration
... -
Step 2: Enclave Membership Administration
...-
if your organization connects the Enclave:
- add organization members to the Enclave (grant them access to the Enclave).
- approve/reject proposed Enclave members in the Enclave.
- add organizations to the Enclave.
-
if your organization does not connect the Enclave:
- propose organization members to the Enclave.
- propose organization members to the Enclave.
-
if your organization connects the Enclave:
-
Step 3: Enclave Administration
...-
if your organization connects the Enclave:
- configure the firewall rules in the Enclave.
- configure DNS Filtering, (optional - only available in Multi-Path Enclaves).
- configure the secrets vault in the Enclave.
-
if your organization connects the Enclave:
-
Step 4: Desktop Administration/Management
...-
if your organization owns the Enclave:
- create Desktops in the Enclave.
- learn the ways Room members can connect to the Enclave's Desktops.
-
if your organization owns the Enclave:
This guide also provides the steps for some additional organization and Enclave administration tasks that are commonly performed by organization Org Admin users and Org/Enclave Managers:
-
Addendum: Additional Admin
...- resend an invitation to become an organization member (organization administration);
- delete an organization member (organization administration);
- edit a Desktop (Desktop management); and
- delete a Desktop (Desktop management).
When you have completed all the steps and tasks outlined in this guide, Tehama will be operational, and Desktop users and service providers will have configured accounts.
Authorized Service Providers will be able to manage resources and customers will have full control over access to their data and their Enclave in Tehama, including Tehama Desktop session recordings (see Desktop Session Auditing/Recordings User Guide).
For more information on:
- Organization Membership Administration - see the Organization User Guide.
- Enclave Membership Administration - see the Enclave Membership User Guide.
- Enclave Administration
- for Enclave/Desktop Connectivity Administration/Management: see the Enclave/Desktop Connectivity - Types, Status and Settings guide.
- for Firewall Rules: see the Firewall Rules User Guide.
- for DNS Filtering: see the DNS Filtering guide (only available in Multi-Path Enclaves).
- for Secrets: see the Secrets Vault User Guide.
- for App Vault: see the App Vault User Guide.
- Desktop Administration/Management - see the Desktops User Guide.
1. Organization Member Admin
After the creation and connection of a Tehama Enclave is completed, the first task is to create teams and invite new members to your Tehama organization.
Create teams
Only the Org Admin user and Org/Room Managers of an organization can create teams in the organization. Check the description of your custom role, to see if you can perform this action.
Create a new team as follows:
- Log in to the Tehama Web UI.
- Click on the MEMBERS tab.
- Click the NEW dropdown menu to open it.
- Select New Team.
- Type in a name for the team (e.g., DB Admins).
- Select the members you want to be in the team.
- Click CREATE.
Repeat these steps for each team needed.
See the Create a Team section in the Organization User Guide for more details.
Invite members
Only the Org Admin user and Org/Enclave Managers of an organization can invite members to the organization. Check the description of your custom role, to see if you can perform this action.
After creating one or more new teams, the next task is to invite new members to the organization.
- Log in to the Tehama Web UI.
- Click on the MEMBERS tab.
- Click the NEW dropdown menu to open it.
- Select Add New Member.
- Enter the member information:
- Name
- Email Address
- Role (Org Admin and Org Manager users can create Staff, Org Manager or Enclave Manager users. Enclave Manager users can create Staff or Enclave Manager users.)
-
Enclave (Optional - select one or more Enclaves from the list of Enclaves. This list of Enclaves consists of all the Enclaves the Organization owns and/or is connected-to (determined when a Enclave is created), or has been invited to join as a third-party organization in the Enclave.)
Note: You can, from here in the MEMBERS tab, assign additional enclaves from this list after the member is created, or you can add/propose Enclave members directly from the interface for a Enclave (first ensuring the organization has access to the Enclave, of course.)
- Team (Select one of the teams created in the previous step or leave this blank)
- Click INVITE.
Repeat these steps for each member you need to invite.
Once invited, new members will receive an invitation email to the address specified. The invitation email contains a link which each new team member must action to gain access to Tehama. The user will also be added/proposed as a member in the selected Enclave(s) (if you selected one or more Enclaves in the dialog).
Note: Org Managers have elevated privileges in Tehama. In addition to using the services available to 'Staff', Org Managers are also able to create Tehama policies (which can be assigned as 'conditions of use' for organizations in Enclave), create and delete team member accounts and create additional Desktops. Enclave Managers have similar privileges to Org Managers, but for Enclave Managers these privileges are restricted to Enclaves of which they are members.
See the Add Members section in the Organization User Guide for more details.
2. Enclave Membership Admin
To begin using an Enclave, the next task will be to grant members and/or organizations access to the Enclave.
- a. Invite 3rd party organization to an Enclave
- b. Add/Propose member to an Enclave
- c. Approve/Reject proposed member in an Enclave
Invite 3rd-party org to Enclave
Only the Org Admin user and Org Managers and Enclave Managers (who are members of the Enclave) of a Enclave's connected organization can invite a third-party organization to the Enclave. Check the description of your custom role, to see if you can perform this action.
The Enclave's connected organization must handle this task.
- Log in to the Tehama Web UI.
- Click on the ENCLAVES tab.
- Click the name of the Enclave where organization access will be granted.
- In the resulting screen (the Enclave interface), click MEMBERS.
From the 'members' screen, you will see a list of organizations that have access to the Enclave. (The initial setup will show only one organization.) - Click the ADD ORGANIZATION button at the bottom of the list or select Organization from the ADD dropdown menu in the top right corner of the page. You will see the ADD ORGANIZATION dialog.
- Select the desired Organization from the list in the dialog to invite to the Enclave.
- Select the desired Policy for the Organization.
- Click INVITE. The organization will receive an invitation email to join the Enclave.
-
OPTIONAL STEP:
You may want to set things up so that you auto approve members in the Enclave that have been proposed by the organization you have added. This is tied to the Tehama policy (condition of use) you have assigned to the other organization. Click on the Enclave's MEMBERS tab, then click on the 'Conditions of use' for the other organization. You will see the ASSIGN CONDITIONS TO ENCALVE dialog. Toggle the "Auto approve proposed members" switch to "On". If you don't do this, every member added to the Enclave by the other organization will result in an approval request. If you do, you are trusting the other organization to add/remove members to the Enclave.
The organization you invited will be a user organization in the Enclave(user-only). See the Roles User Guide for more information on organization roles in Enclaves.
Note:
The list of organizations you see in the ADD ORGANIZATION dialog is a subset of existing Tehama organizations. This subset is composed of organizations that already have access to other Enclave in your organization. These organizations are considered to be 'authorized' by your organization.
If you wish to grant access to an existing organization that is not already authorized by your organization, select the option in the dialog to invite a new organization. The contact that you specify can choose to connect to your Enclave using their existing organization, or create a new one.
If you wish to grant access to a company that does not have a Tehama organization yet, select the option in the dialog to invite a new organization. The contact that you specify will create a new Tehama organization for their company.
See the Invite organizations to join an Enclave section in the Enclave Membership User Guide for more details.
Add/propose member to Enclave
Only the Org Admin user and Org Manager and Enclave Managers (who are members of the Enclave) of the connected organization in the Enclave can add members to the Enclave.
Only the Org Admin user and Org Manager and Enclave Managers (who are members of the Enclave) of an organization in the Enclave that is not the connected organization can propose members join the Enclave.
Check the description of your custom role, to see if you can perform this action.
With members (and teams) now created, the next task is to grant member access to your Enclave.
If your organization is your Enclave's connected organization, then you can directly add members.
If your organization is not your Enclave's connected organization, then you can only propose members, and the connected organization will approve (or reject) your proposals.
Choose one method below to add members or teams to the Enclave.
Add/Propose Individual Members
- Log in to the Tehama Web UI.
- Click on the ENCLAVES tab.
- Click the name of the Enclave for which member access is to be granted.
- In the resulting screen (the Enclave interface), click MEMBERS.
From the 'members' screen, you will see a list of organizations that have access to the Enclave. (The initial setup will show only one organization.) - To the left of the Organization name, Click the drop-down arrow
 icon to show the list of members for the organization.
 - At the top of the drop-down, click the + MEMBER button.
(or the + PROPOSE button if you are not part of the connected organization). - From the ADD dialog, choose Members.
(This dialog is the PROPOSE TEAM MEMBER dialog if you are not part of the connected organization.)
(You may also opt to choose Invite New Member instead of Members, which will allow you, following the steps to 'Invite New Members', to invite a member to join the organization and add them to the Enclave.) - Select the member (or multiple members) from the list to add to the Enclave.
- Click the ADD button.
- Close the list of members by clicking on the drop-down arrow.
 icon.
icon.
Note, If you see that your new Enclave already has a member, note that if the Enclave was created by a user with the Enclave Manager role, then that user will have been automatically added to the Enclave as a member.
Add/Propose an Entire Team of Members
- Log in to the Tehama Web UI.
- Click on the ENCLAVES tab.
- Click the name of the Enclave for which member access is to be granted.
- In the resulting screen (the Enclave interface), click MEMBERS.
From the 'members' screen, you will see a list of organizations that have access to the Enclave. (The initial setup will show only one organization.) - To the left of the Organization name, click the drop-down arrow icon to show the list of members for the organization.
- At the top of the drop-down, click the + MEMBER button
(or the + PROPOSE button if you are not a part of the connected organization). - From the ADD dialog, choose Teams.
(this dialog is the PROPOSE TEAM MEMBER dialog if you are not part of the connected organization). - Select the Team (or multiple teams) from the list to add to the Enclave.
- Click the ADD button.
- Close the list of members by clicking on the drop-down arrow icon
See section Propose Enclave members and section Add Enclave members in the Enclave Membership User Guide for more details.
Also, see the Assign members to one or more Enclaves section in the Organization User Guide for details on how to assign a member to one or more Enclaves from the MEMBERS tab.
Approve/Reject proposed member in Enclave
Only the Org Admin user and Org Manager and Enclave Managers (who are members of the Enclave) of the connected organization in the Enclave can approve or reject proposed members in the Enclave. Check the description of your custom role, to see if you can perform this action.
If your organization is your Enclave's connected organization and your Enclave has other organizations in it, they may have proposed members join the Enclave. You will receive notification when a proposal is made. You can approve or reject these proposals.
Note: You may have set things up so that you auto approve members in the Enclave that have been proposed by the other, non-connected, organizations in the Enclave. In this case, you will not need to approve proposed members - they will be automatically approved. To set this up, click on the Enclave's MEMBERS tab, then click on the 'Conditions of use' for the organization. You will see the ASSIGN CONDITIONS TO ENCLAVE dialog. Toggle the "Auto approve proposed members" switch to "On".
- Log in to the Tehama Web UI.
- Click on the ENCLAVE tab.
- Click the name of the Enclave for which member access is to be granted.
- In the resulting screen (the Enclave interface), click MEMBERS.
From the 'members' screen, you will see a list of organizations that have access to the Enclave. (The initial setup will show only one organization.) - Locate the organization name (for the organization making the request).
- Expand that organization (click on the down arrow beside the organization name).
- Click on the three vertical dots under the Actions column in the row for the proposed member:
- To approve: select 'Approve Enclave access'.
- To reject: select 'Reject Enclave access'. You will see a REJECT dialog.
-
Click to place a checkmark beside "I acknowledge" after reading the following text:
"The selected member(s), once rejected, will have restricted access to the Enclave. They will no longer be able to access certain resources such as their Desktop(s) or the file vault." - Click the REJECT button to proceed.
-
3. Enclave Administration
After assigning members (or whole teams) to the Enclave, the next task is to enable connectivity (through the creation of firewall rules) and add secrets/passwords for assets/resources in the connected network.
Create firewall rules/Add DNS Filtering
Only the Org Admin user and Org Managers and Enclave Managers (who are members of the Enclave) of a Enclave's connected organization can create firewall rules or add DNS filtering in the Enclave. Check the description of your custom role, to see if you can perform this action.
The Enclave's connected organization must handle this task.
Firewall rules
Before the Enclave's Desktops (workspaces) can communicate with network resources, you need to configure firewall rules. By default, all outbound traffic is restricted. (Note, configuring a secret (below) also allows the creation of a firewall exception.)
- Log in to the Tehama Web UI.
- Click on the ENCLAVES tab.
- Click the name of the Enclave for which you want to add firewall rules.
- In the resulting screen (the Enclave interface), click CONNECTION.
- Click on the FIREWALL RULES sidebar item.
- Click ADD RULE.
- In the resulting screen, enter the following information:
- Rule Name (a friendly name for the firewall exception)
- IPv4 CIDR block (IP addresses to expose with Subnet Prefix). E.g.: 127.0.0.1/32)
- Protocol - the protocol supported by the rule (TCP or UDP).
- Port Single port, Port range or All ports (choose one).
- Port (enter the port number or port range required for the application).
- Click CREATE.
Note: Using the CIDR block of 0.0.0.0/0 will disable the firewall and expose the Enclave's Desktops to the internet. While this may be desirable to install software packages, it is not recommended to operate normally with this configuration. (Though, you may choose to set the "Allow Web Access" firewall configuration in conjunction with the DNS Filtering feature, to allow Windows Updates in your otherwise internet-constricted Enclave.)
Note: Tehama denies all UDP traffic apart from DNS lookup to internet destinations not controlled by the Tehama Multi-Path connections, by default. Override in your Enclave's firewall settings if necessary.
See the Add custom firewall rule section in the Firewall Rules User Guide for more details.
DNS Filtering
Tehama's DNS Filtering feature lets you define a list of allowed domains. Access to the internet is restricted first to those domains, and second, by firewall rules in the Enclave. If no domains are listed, then only firewall rules are used to determine access to the internet.
This feature is available for Tehama's 'Multi-Path' Enclaves (Enclave with network access set to 'Multi-Path').
- Log in to the Tehama Web UI.
- Click on the ENCLAVES tab.
- Click on the name of the Enclave whose allowed domains you want to edit. You will see the Room's interface. The tabs you will see depends on the role you have within your organization.
- Click on the CONNECTION tab.
- Click on the DNS Filtering sidebar item. (You will not see this sidebar item if the Enclave is not a Multi-Path Enclave.)
- Click on + Add domain. A domain field will appear.
- Enter the domain into the domain field.
Notes:- Your domain name must consist of one or more hierarchical parts, delimited by dots. For example, "example.com".
- Do not include "http://" or "https://" in your domain name. Tehama's DNS Filtering does not differentiate between "http" and "https".
- Do not include wildcard characters, such as an asterisk '*', in your domain name. Tehama's DNS Filtering infers a wildcard at the start of each domain name. For example, 'example.com' is equivalent to '*.example.com'.
- Click on the checkmark. You will see the domain appear in the list of allowed domains directly below the search field on the page.
Now that the domain has been added:- if the user of a Desktop in the Enclave tries to access the internet via a domain address that matches this domain, Tehama will resolve the domain to an IP address, and only then proceed to check if access to that IP is allowed by the Enclave's firewall rules.
See the Add Allowed Domain section in the DNS Filtering guide for more details.
NOTE: DNS Filtering is the recommended method to Allow Windows Updates for Windows Desktops in an Enclave with completely restricted (otherwise) internet access, that have set up the Windows Server Update Services (WSUS). Follow the instructions found in the section 'Allow Windows Updates' of the 'DNS Filtering' guide.
Add secrets/passwords (specific to AWS Enclaves only)
Only the Org Admin user and Org Managers and Enclave Managers (who are members of the Enclave) of a Enclave's connected organization can add secrets to the Enclave. Check the description of your custom role, to see if you can perform this action.
The Enclave's connected organization must handle this task.
To avoid sharing network resource credentials insecurely, Tehama provides access to an encrypted Secret Password store used to securely store, encrypt, and grant authorized members access to credentials and other sensitive information.
- Log in to the Tehama Web UI.
- Click on the ENCLAVES tab.
- Click the name of the Enclave for which you want to configure secrets.
- In the resulting screen (the Enclave interface), click CONFIGURE.
- Click on the SECRETS sidebar item.
You will see a list of secret types, (Cassandra, Generic, MongoDB, etc.) - Click the type of secret you wish to add.
The secret view is organized by:- asset (secret, e.g. Database credentials)
- folder (for logical storage of assets)
- Create a Folder to organize the secrets.
- (a) Click the ADD secret type FOLDER button.
- (b) In the resulting screen, enter the desired Folder name and fill in the required fields. e.g: a firewall exception may need to be specified.* (See the Secrets Vault User Guide for more guidance.)
- (c) Click CREATE.
- Create an Asset.
-
(a) Double-click the folder name where the Asset is to be filed.
If no folder is specified, the root folder will be used. -
(b) Click the ADD ASSET button.
In the resulting screen, enter the following:- Asset Name (friendly name for your asset/secret) and fill in any required fields. (See the Secrets Vault User Guide for more guidance.)
- (c) Click CREATE.
-
(a) Double-click the folder name where the Asset is to be filed.
Authorized members can click the asset name to access the asset under the SECRETS sidebar item within the Enclave's WORK tab. They may also access the asset from the 'Workspace Agent' application's SECRETS tab with one of the Enclave's Desktops.
See the Secrets Vault User Guide for more details.
* Be aware of the DNS Filtering feature that is available in Multi-Path Enclaves. If this feature is active, be sure to add any domain(s) used to access your secret to the DNS Filtering feature's list of allowed domains.
4. Desktop Admin/Mgmt
Now that the configuration of your Enclave is completed, you need to you need to create your Desktop templates, from which your virtual Desktop instances are built. Once it is built, you will need to find its interface in the Tehama Web UI.
Now that you have (at least one) Desktop template in your Enclave along with its associated Desktop instances, you, and other members in your Enclave that are assigned to a Desktop template, are almost ready to use your new Desktops. First you and your members need to configure your devices to connect to your Desktops.
The last step is for you and your members to learn how to connect to their Desktops.
- d. Connect to a Desktop (single click) (recommended connection method)
- e. Connect to a Desktop (with credentials) via Teradici PCoIP Client (alternative to single click)
Create desktop templates
Only the Org Admin user and Org Managers and Enclave Managers (who are members of the Enclave) of a Enclave's owner organization (owner+connected or user+owner) can add a new Desktop template to the Enclave directly and then assign Enclave members to it. Check the description of your custom role, to see if you can perform this action.
The Enclave's owner organization must handle this task.
Members require a Desktop instance to perform their functions. Create a Desktop template and assign members to it. Desktop instances will be built for the assigned members from the template.
Notes:
- Depending on your Enclave type, Tehama provides your organization with two options for Windows-based virtual desktops:
- AWS Enclaves: Tehama Windows desktops on ServerOS 2022
- Azure Enclaves: Tehama Azure virtual desktops on Windows 11
- Linux-based desktops are only available in AWS Enclaves.
- Configuring admin rights during desktop template creation is only visible in AWS Enclaves. In Azure Enclaves, organizations can choose to enforce admin rights or their lack of, directly within their Azure portal (for customer-hosted enclaves) or by making a request to Tehama support during template creation for Tehama-hosted Azure enclaves.
- Log in to the Tehama Web UI.
- Click on the ENCLAVES tab.
- Click the name of the Enclave for which you want to create a Desktop template.
- In the resulting screen (the Enclave interface), click on the CONFIGURE tab.
From the 'configure' screen you can see your Enclave's configuration details, add/remove secrets and, of interest to us here, add/edit/remove Desktop templates. -
Click on the WINDOWS DESKTOPS or LINUX DESKTOPS sidebar item, depending on what type of Desktop template you wish to add (Windows-based Desktops or Linux-based Desktops, respectively). Note: Linux Desktops are only available in AWS Enclaves. A list of previously configured Desktop templates will appear. On initial configuration, there will be no Desktop templates displayed.
Note: If you do not see the WINDOWS DESKTOPS or LINUX DESKTOPS sidebar item, then 'Windows Desktops' or 'Linux Desktops', respectively, is not enabled for your Enclave. Stop now and enable Windows Desktops or Linux Desktops in your Enclave, then try again.
- Contact Tehama Support to enable Windows Desktops or Linux Desktops in your Enclave, or you may enable the feature through the Enclave Settings interface. See the Enable/Disable Windows Desktop section or the Enable/Disable Linux Desktop section in the Enclaves User Guide.
-
Initiate the creation of a Desktop template as follows:
-
For Windows-based Desktops:
Click the ADD WINDOWS DESKTOP TEMPLATE button in the top right corner of the page. -
For Linux-based Desktop templates:
Click ADD LINUX DESKTOP TEMPLATE in the top right corner of the page.
The Desktop template creation dialog relevant to the type of Desktop will appear.
-
For Windows-based Desktops:
- Proceed as follows:
-
For Windows-based Desktops:
-
Windows Desktops:
- First enter the requested information:
- Name of Desktop (friendly name used to identify the Desktop template function or owner)
- Image (hardware specifications)
- Certain Desktop images in the dropdown list may not be available in all regions. Read through the list of supported Desktop specifications/images by region to see what is currently supported in your Enclave's region.
- Certain Desktop images in the dropdown list may not be available in all regions. Read through the list of supported Desktop specifications/images by region to see what is currently supported in your Enclave's region.
- First enter the requested information:
-
Windows Desktops:
- Click on the CREATE DESKTOPS FOR MEMBERS button. The CREATE DESKTOP(S) dialog will appear. (Click on the arrow to the left of the dialog title to return to the previous dialog.)
- Click on the Users field to open the list of Enclave members that you can assign to this Desktop template. (These are the users who will have access to the Virtual Desktop instance built from this template.)
- Select the name(s) of the Enclave members that you wish to assign to this Desktop template. A separate Desktop instance will be created for each user. (Tehama can create up to five Desktop instances at one time. You can edit the Desktop template after creation in order to add more. There must be at least one name specified. At this time, a template cannot be created without at least one Enclave member assigned to it.)
- Click CHOOSE DESKTOP OPTIONS. The ENABLE DESKTOP ADMIN RIGHTS dialog will appear. (Note, if your Enclave is a domain joined Enclave, then this dialog is skipped - your Windows Desktop will inherit its privileges from the domain.)
- Place a checkmark in the checkbox beside the sentence "Give desktop admin rights to desktop(s)" if you wish to allow the members the ability to install apps and modify system settings. Leave it unchecked otherwise.
- Click REVIEW. The REVIEW dialog will appear.
- Read the disclaimer (if any) and review the specification details. (Note, you may be required to accept terms and conditions.)
- Click CREATE. The SUCCESS dialog will appear.
- Click CLOSE to dismiss the SUCCESS dialog.
-
For Windows-based Desktops:
-
For Linux-based Desktops:
-
Linux Desktops:
- Enter the requested information:
- Name of Desktop (friendly name used to identify the Desktop function or owner)
- Operating System
- Image (Hardware specifications)
- Certain Desktop images in the dropdown list may not be available in all regions. Read through the list of supported Desktop specifications/images by region to see what is currently supported in your Room's region.
- Click on the CREATE DESKTOPS FOR MEMBERS button. The CREATE DESKTOP(S) dialog will appear. (Click on the arrow to the left of the dialog title to return to the previous dialog.)
- Click on the Users field to open the list of Enclave members that you can assign to this Desktop template.
- Select the name(s) of the Enclave members that you wish to assign to this Desktop template. A separate Desktop instance will be created for each user. (Tehama can create up to five Desktop instances at one time. You can edit the Desktop template after creation in order to add more. There must be at least one name specified. At this time, a template cannot be created without at least one Room member assigned to it.)
- Click CHOOSE DESKTOP OPTIONS. The ENABLE DESKTOP ADMIN RIGHTS dialog will appear.
- Place a checkmark in the checkbox beside the sentence "Give desktop admin rights to desktop(s)" if you wish to allow the members the ability to install apps and modify system settings. Leave it unchecked otherwise.
- Click REVIEW. The REVIEW dialog will appear.
- Review the specification details.
- Click CREATE. The SUCCESS dialog will appear.
- Click CLOSE.
- Enter the requested information:
-
Linux Desktops:
See the Add a Desktop Template section in the Desktops User Guide for more details.
Find your desktop
All members of an Enclave that have been assigned to a Desktop template in the Enclave will be able to view the Desktop instance generated for them from the template in the Tehama Web UI.
The Tehama Web UI provides lists of Desktop instances. Find your Desktop's list entry, so you can begin working with it.
Desktops are identifiable by the combination of their names and the name of the Enclave they belong to.
Find your Desktop in the Tehama Web UI:
-
Choose A or B.
A: find the Desktop in the list of all your Desktops in the organization- Log in to the Tehama Web UI.
- Click on the DESKTOPS tab.
- Verify that the DESKTOPS option at the top of the page is selected. You will see a table of Desktop instances. (NOTE: If you are a Staff member in the organization, you will not see options at the top of the DESKTOPS page; the page you see is the equivalent of the DESKTOPS option. Otherwise, your options are DESKTOPS and IMAGES. DESKTOPS is the default option.)
- Click the My Desktops radio button at the top of the page. Your Desktop instances will be uniquely identified by the template name and the Enclave name. (NOTE: If you are a Staff member in the organization, you will not see this radio button. The list will be restricted to only your assigned Desktops by default.)
- Look for the entry in the list with your Desktop's template name and your Desktop's Enclave's name.
B: find the Desktop in the list of your Desktops in the interface of the Enclave it belongs to
- Log in to the Tehama Web UI.
- Click on the ENCLAVES tab.
- Click on the name of the Enclave to which your Desktop belongs. You will see the Enclave's interface.
- Click the Enclave's WORK tab.
- Click on the MY DESKTOPS sidebar item.
- Look for the entry in the list with your Desktop's name.
Each Desktop entry, in either the DESKTOPS page or the ENCLAVES -> WORK -> MY DESKTOPS page, has a CONNECT button, that you will use to connect to your Desktop, to begin work. But first, continue to the next step and download the Tehama Client onto your device.
Download Tehama Client
Download and Install Tehama Client (AWS Enclave)
All members of an Enclave that have been assigned to a Desktop template in the Enclave will have access to the Tehama Desktop Client and the Teradici PCoIP Desktop Client downloads required to configure their devices through the Tehama Web UI.
The Tehama Client is required for launching a Desktop in AWS Enclaves with a single click. The Teradici PCoIP Client is used to launch a Desktop manually with credentials. (The Tehama Client uses Teradici PCoIP technology.)
Download and install the Tehama Client and the Teradici PCoIP Client onto your device before attempting to launch a Desktop from it.
This is a one-time action per device.
You can find information about the Tehama Client and links to download it on the TEHAMA CLIENT page.
- Log in to the Tehama Web UI.
- Click on the DESKTOPS tab.
- Click on the INSTALL CLIENT button in the top right of the page.
Perform the download and installation as described for your device in the relevant installation article:
- For Windows devices: Install Tehama Client on Windows
- For Linux devices: Install Tehama Client on Linux
- For Mac devices: Install Tehama Client on Mac
These articles describe how to download the client, clean up previous versions of the client on your device, install the client and configure client permissions, where necessary.
You can test the single-click connect capability by clicking on the CONNECT button for any of your Desktops in the DESKTOPS page. This will launch your Desktop instance as a standalone application.
See the Download the Tehama Client onto Your Device section in the Desktops User Guide for more details.
Download and Install Windows App (Azure Enclaves)
For Tehama Azure virtual desktops in Azure Enclaves, users can connect to the desktops either by downloading and installing the Windows App or connecting directly within the browser (HTML5) without relying on an installed client application.
You can download and install the Windows App via the links below, dependingon your relevant device:
For Windows devices:https://apps.microsoft.com/detail/9n1f85v9t8bn?hl=en-US&gl=CA
For macOS devices: https://apps.apple.com/us/app/windows-app/id1295203466?mt=12
For Android devices: https://play.google.com/store/apps/details?id=com.microsoft.rdc.androidx&hl=en_CA
For iOS devices: https://apps.apple.com/us/app/windows-app-mobile/id714464092
Connect to a Desktop (single click, AWS Enclaves):
All members of an Enclave that have been assigned to a Desktop template in the Enclave can connect to their instance of the Desktop template.
Connect (launch and log in to), with a single click, to your Desktop instance. While you are connected to your Desktop, it is considered to be 'in use'.
To connect to your Desktop:
-
Locate the entry for the Desktop to which you want to connect in the Tehama Web UI.
Look for the CONNECT button in the entry.-
Note: If you see the word UNAVAILABLE next to the template's name instead of the CONNECT button, it means there are too many Desktop instances currently in use within the Enclave the template belongs to, and you will not be able to connect. A maximum of 75 Desktops can be in use within an Enclave concurrently when the Enclave has the Recordings Enclave feature enabled and a maximum of 200 Desktops when the Enclave has the Recordings Enclave feature disabled. (See the Desktop Session Auditing/Recordings User Guide for more details.)
-
Click on the CONNECT button in the entry.
This will launch your Desktop instance as a standalone application.
Issues you might encounter:
Tehama Client is not installed:
IMPORTANT: Your Desktop will fail to launch unless you have downloaded the Tehama Client and the Teradici PCoIP Client to your device.
Follow the steps in section Download the Tehama Client onto Your Device. This is a one-time action per device.
You need to accept the Enclave's conditions of use policy:
If you see the ACCEPT POLICY dialog, it means that you have not yet accepted the policy currently assigned as the 'condition of use' for your organization in the Enclave (or it has been updated since you last accepted it). Click on GO TO POLICY in the dialog, to go to the Enclave's CONDITIONS OF USE page. CLick I ACCEPT to accept the policy; then navigate back to your desktop entry and click CONNECT again.
You are in violation of the Enclave's conditions of use policy:
If you see the DENIED ACCESS dialog, it means that you are in violation of the policy currently assigned as the 'condition of use' for your organization in the Enclave. Contact your manager to determine the nature of the violation.
(See the Policies (Conditions of Use for Enclaves) User Guide for information on policies.)
A sequence of dialogs will let you know the stage of your connection request.
Stage 1 - Desktop Preparation: The PREPARING YOUR DESKTOP... dialog will appear while your Desktop is preparing for launch (for example, your desktop may be starting, or it may be coming out of hibernation). This dialog will remain visible until the Desktop is ready to launch.
Note, if for some reason, your Desktop failed to prepare itself for the launch stage successfully, the PREPARATION FAILED dialog will appear. You can retry the connection through the "Retry" link found on this dialog.
Stage 2 - Desktop Launch: The LAUNCHING YOUR DESKTOP... dialog will appear. This dialog will remain visible for a number of minutes while your Desktop launches.
You will see a message asking you to allow the Tehama application that launches the Desktop to open. You must allow the application to open in order to launch your Desktop.
-
On Mac:
Message: "Open Tehama.app?"
Click on Open Tehama.app to allow the app to open. -
On Linux:
Message: "Open xdb-open?"
Click on Open xdb-open to allow the app to open. -
On Windows:
Message: "Open Microsoft© Windows Based Script Host".
Click on Open Microsoft© Windows-based Script Host to allow the app to open.
Optional: Check the box beside the "Always allow <your corporate portal> to open links of this type in the associated app", before clicking on the Open button to permanently allow the application to open without having to see this message again.
-
Stage 3 - Desktop Ready-for-use: The LAUNCH COMPLETE dialog will appear. At this point, your Desktop should be launched and ready for you to use.
Note, if for some reason your Desktop failed to launch, you can retry the connection from the for your desktop in the table entry or through the "Retry" link on the LAUNCH COMPLETE dialog. Alternately, you can try to connect to your Desktop by entering the login credentials for your Desktop into the Teradici PCoIP Client. You can copy the necessary credentials from the Show Credentials dropdown on the LAUNCH COMPLETE dialog. You can manually connect to your desktop from the Teradici desktop client's user interface with these credentials. See section 'Connect to a Desktop (with credentials) via Teradici PCoIP Client'.
See section Connect to a Desktop (single click) in the Desktops User Guide for more details.
Connect to a Desktop (with credentials) via Teradici PCoIP Client -AWS Enclaves:
All members of an Enclave that have been assigned to a Desktop template in the Enclave can connect to their instance of the Desktop template.
If, for some reason, you have trouble connecting to your Desktop through the single-click CONNECT button for your desktop in the table entry or through the "Retry" link on the LAUNCH COMPLETE dialog, you can manually connect to your Desktop from the Teradici PCoIP Client's user interface with credentials.
IMPORTANT: Your Desktop will fail to launch unless you have downloaded the Tehama Client and the Teradici PCoIP Client to your device.
Follow the steps in section Download the Tehama Client onto Your Device. This is a one-time action per device.
- Attempt to Connect to a Desktop (single-click).
- From the LAUNCH COMPLETE dialog at the end of the launch sequence, click on the "Show Credentials" dropdown link. The host address/username/password credentials needed for manual connection will appear.
- Launch the Teradici PCoIP Client in your device. You should see its user interface appear.
-
Copy the Host Address/Registration Code field value into the "Host Address or Code" field in the Teradici PCoIP Client.
Note: For convenience, in Tehama, copy buttons are available that automatically place the Host Address/Registration Code, User Name or Password into the clipboard.
Note: Desktop credentials are dynamic. The password is automatically rotated every five minutes. - Enter a name for this connection in the Teradici PCoIP Client's "Connection Name" field.
- Click NEXT in the Teradici PCoIP Client.
- Copy the Username field value into the "Username" field in the Teradici PCoIP Client.
- Copy the Password field value into the "Password" field in the Teradici PCoIP Client. (To view the Password value as plaintext, click on the 'eye' symbol in the field.)
- Click LOGIN in the Teradici PCoIP Client. This will launch your Desktop instance as a standalone application.
See section Connect to a Desktop (with credentials) in the Desktops User Guide for more details.
Connecting to Tehama’s Azure virtual desktops via Windows App (browser-based, HTML5 in Azure Enclave)
This step tells you how to connect to your Tehama Azure virtual desktop.
From your host device using web browsers:
- Log in to your corporate Tehama portal (on one of the supported browsers).
- Click on the DESKTOPS tab in the navigation bar. You will see the DESKTOPS page.
-
Locate the desktop you wish to connect to in the list of desktops on the page.
Most end-users will have just one desktop assigned to them. If you have more than one and are uncertain of the purpose of each, talk to your employer.
-
Click on the CONNECT button for your desktop. You will be directed to the Microsoft Windows App webpage to authenticate:
- For Tehama-hosted AVDs: Use your provided @tehama.io credentials to authenticate to the Windows App.
- For customer-hosted AVDs: Use your corporate Microsoft account (provided by your employer) to authenticate to the Windows App.
- Once authenticated to the Windows App, click on the Connect button for your Tehama AVD.
- You will be prompted to enter your Microsoft credentials again. The virtual desktop will then launch within the browser.
Connecting to Tehama’s Azure virtual desktops (AVD) via installed Windows App in Azure Enclave
This step tells you how to connect to your Tehama Azure virtual desktop.
From your host device using the installed Windows App:
- Download the Windows App via Microsoft Store: https://apps.microsoft.com/detail/9n1f85v9t8bn?hl=en-US&gl=US
-
Run the application and authenticate using your Microsoft credentials:
- For Tehama-hosted AVDs: Use your provided @tehama.io credentials to authenticate to the Windows App.
- For customer-hosted AVDs: Use your corporate Microsoft account (provided by your employer) to authenticate to the Windows App.
- Click on Devices from the side navigation menu and click on Connect to launch your Tehama Azure virtual desktop.
Welcome to your first Tehama virtual desktop session!
⁍ (Addendum) Additional Admin
This section details additional administrative functions that are performed only as needed, and are not necessary to begin using Tehama.
They are included here in this getting started guide since they are commonly performed tasks.
Resend org invite
Only the Org Admin user and Org/Enclave Managers of an organization can resend an invite email. Check the description of your custom role, to see if you can perform this action.
In the event the original email invitation link has expired, a new invite may be generated and sent. Follow these steps to resend an invite:
- Log in to the Tehama Web UI.
- Click on the MEMBERS tab.
- Click name of the invited, but still pending, member you wish to resend an invite to.
- In the resulting screen, Click the blue RESEND INVITE button.
- If there is a need to send the link manually, you can use the invitation link presented.
See section 'Resend member invite' in the Organization User Guide for more details.
Delete org members
Only the Org Admin user and Org/Enclave Managers of an organization can delete a member of the organization. Check the description of your custom role, to see if you can perform this action.
Note: If the organization has enabled Single Sign On (SSO) and SCIM user provisioning as its authentication method, delete or un-assign members from Tehama in the identity provider used. (See the section SSO User Provisioning in the Corporate Single Sign On (SSO) Authentication and User Provisioning page for more information.)
Should you need to delete existing members, follow these steps:
- Log in to the Tehama Web UI.
- Click on the MEMBERS tab.
-
Option 1 (allows for bulk deletions):
-
(a) Select the member you wish to delete by clicking in the checkbox to the left of the member's name. Select multiple members for bulk deletions.
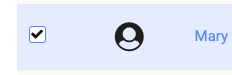
- (b) At the bottom of the page, click the Trash Can icon. You will see the DELETE MEMBER(S) dialog.
-
(c) Confirm that you want to continue with the deletion and click DELETE.
-
(a) Select the member you wish to delete by clicking in the checkbox to the left of the member's name. Select multiple members for bulk deletions.
-
Option 2:
-
(a) In the row for the member you wish to delete, click on the three vertical dots menu under the Actions column.
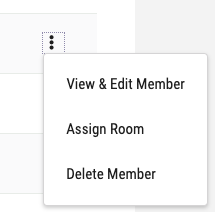
- (b) Select the Delete Member item. You will see the DELETE MEMBER(S) dialog.
- (c) Confirm that you want to continue with the deletion and click DELETE.
-
(a) In the row for the member you wish to delete, click on the three vertical dots menu under the Actions column.
-
Option 1 (allows for bulk deletions):
See section Delete a member in the Organization User Guide for more details.
Edit a Desktop
Only the Org Admin user and Org Managers and Enclave Managers (who are members of the Enclave) of a Enclave's owner organization (owner+connected or user+owner) can edit an existing Desktop template in the Enclave. Check the description of your custom role, to see if you can perform this action.
The Enclave's owner organization must handle this task.
If you need to modify the Virtual Desktop (Desktop Name or Member permissions only) follow these steps:
- Log in to the Tehama Web UI.
- Click on the ENCLAVES tab.
- Click the name of the Enclave that contains the Desktop you wish to edit.
- In the resulting screen (the Enclave interface), click CONFIGURE.
- Click on the WINDOWS DESKTOPS or LINUX DESKTOPS sidebar item, depending on what type of Desktop template you wish to edit.
- A list of previously configured Desktops will appear.
- Locate the Desktop template you wish to edit.
- Click on the three vertical dots under the Actions column in the entry you wish to edit, then select 'Edit'. In the resulting dialog:
- (a) Modify the name of the Desktop.
- (b) Add or remove members as necessary by clicking in the drop-down list for the Users field.
- (c) Click SAVE.
Note: Tehama can create up to five Desktop instances at one time, so restrict the number of new members added to the Users field during each edit session to five.
See the Edit a Desktop section in the Desktops User Guide for more details.
Delete a Desktop
The Org Admin users and Org Managers and Enclave Managers (who are members of the Enclave) of a Enclave's owner organizations (owner+connected or user+owner) can delete Desktop templates in the Room. Check the description of your custom role, to see if you can perform this action.
If you need to delete a Desktop template completely, follow these steps:
- Log in to the Tehama Web UI.
- Click on the ENCLAVES tab.
- Click the name of the Enclave that contains the Desktop template you wish to delete.
- In the resulting screen (the Room interface), click CONFIGURE.
- Click on the WINDOWS DESKTOPS or LINUX DESKTOPS sidebar item, depending on what type of Desktop template you wish to delete.
- A list of previously configured Desktops templates will appear.
- Locate the Desktop template you wish to delete.
- Click on the three vertical dots under the Actions column in the entry you wish to delete, then select 'Delete'. The DELETE DESKTOPS dialog will appear.
- Type the name of the Virtual Desktop to confirm deletion (case sensitive).
- Click DELETE.
See the Delete a Desktop section in the Desktops User Guide for more details.